Parent / Carer
Family Programmes
Information
Balanced diet for young children
The Eatwell Guide is designed to show us how to achieve a healthy balanced diet containing all the key nutrients our bodies need. It does not apply fully to children under the age of 2 as they have specific nutritional needs however, between the ages 2-5 years, children will gradually move to eating the same foods as the rest of the family.
The video details the message in The Eatwell Guide and how they apply to young children.
Healthy Food Song
Join in with the NYLO team as they sing about foods that keep our body healthy.
Fruit and Vegetables
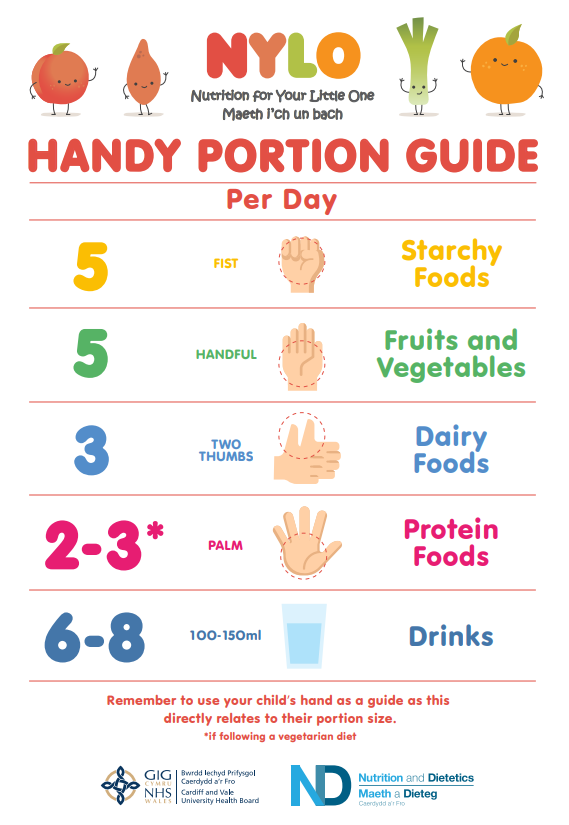
This is one of the larger sections on the Eatwell guide so it is important children eat lots of these foods. They contain a range of vitamins and minerals as well as being a great source of fibre.
Potatoes, bread, rice, pasta, and other starchy carbohydrates
This group is also one of the larger sections of the Eatwell Guide and should be included with every meal and ideally as one snack. These foods provide the body with energy, fibre, B vitamins and some are fortified with iron.
Dairy and alternatives
This group includes foods such as milk, (including breast milk), cheese, yogurts and dairy alternatives. These foods are a great source of calcium which is needed for strong bones and teeth and are also a good source of protein.
Beans, pulses, fish, eggs, meat and other proteins
These foods are a great source of protein. Protein is important for growth and building muscles which is especially important for children. They are also rich in iron and zinc.
Oils and spreads
This group contains unsaturated oils and spreads made from these oils. Unsaturated fats come from plant-based fats and are a healthier choice for our heart. Examples of these are vegetable oil, sunflower oil or olive oil and spreads made with these oils. This is the smallest section, so children only need a small amount of these foods.
Drinks
Water and milk are the best fluids for children. They should aim for 6-8 drinks each day. On hotter days or when they are doing more physical activity, they may need more than this.
Foods high in saturated fat, salt and sugar
The type of foods you’d find in this group are chocolate, butter, biscuits, cream, sweets, full sugar soft drinks, crisps, stock cubes and ice cream. It also includes fats such as butter, ghee, coconut oil and cream. This group is outside of the main Eatwell Guide as these foods are not essential in the diet, so should be eaten in small amounts and less often.
Healthy snack ideas
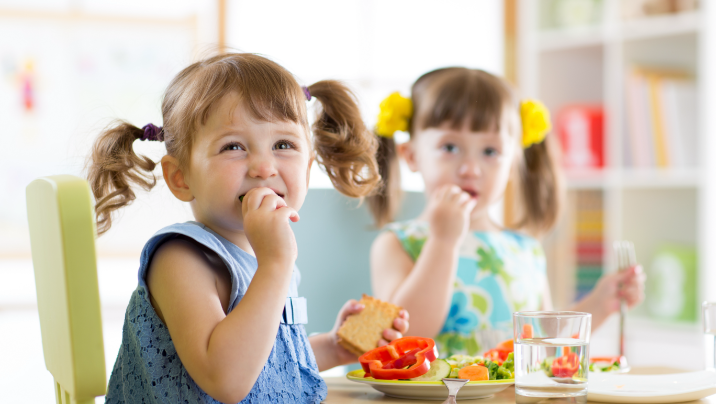
Healthy snacks can be a great opportunity to provide your child with the key nutrients they need for general health and development. Try to focus on giving snacks from the main food groups:
- Fruit and Vegetables
- Carbohydrates – bread, rice, potatoes, pasta and other cereals
- Protein – meat, fish, eggs and beans
- Milk and dairy foods
We know that children in Wales are not eating enough foods from the fruit and vegetable food group. Snacks are a great opportunity to give these foods either alone or in combination with another food group for example, you could try adding some fruit to their yogurt or adding vegetables to a rice cake. You could also try our Fruity Faces recipe.

Carbohydrates provide children with the energy they need to be active therefore these can be a great snack idea. But remember to make sure they do not have added fat, sugar or salt. You can also add some fruit or vegetables to these to boost the vitamin and minerals.
It is also important to consider how much of these snacks our child is eating. Too many snacks can fill them up, making it less likely they will eat their main meal. As a guide you offer 2 healthy snacks every day.

TIP – Remember to check the label of your child’s snacks to ensure it is a healthy choice!
Here are some snack ideas which include some of the main food groups:
Rice cake with cream cheese, pepper and grapes

Cracker with hummus, celery and carrot sticks

Sugar in snacks and drinks
Less healthy snack options can often provide children with high amounts of fat, sugar and salt. Try to limit foods such as crisps, chocolate, cakes, sweets, biscuits and ice cream.
Favourite snacks animation
Children love to be involved in preparing healthy snacks, so try getting them to spread foods and support them to chop foods. Watch the NYLO team talk about their favourite snacks and how they get involved.
Managing fussy eating
Children often go through phases of fussy eating. This video shares tips on how to encourage your child to try new foods.
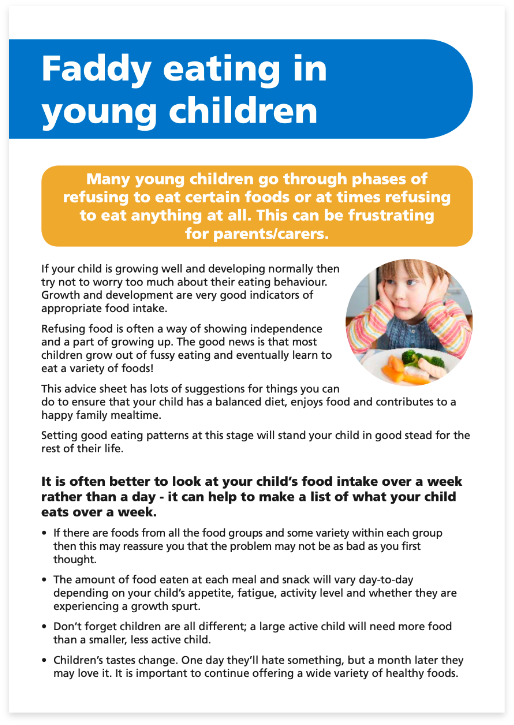
Many young children go through phases of refusing to try new foods or refusing foods they used to enjoy. This can be worrying or frustrating for parents and carers.
Most children grow out of fussy eating and learn to eat a variety of foods
The following tips can help to manage this phrase
1
Provide plenty of opportunities for your child to see, smell and touch a variety of foods outside of mealtimes. This can be through food play such as messy play, cooking activities, crafts using real foods, books and songs.
2
Some children are more sensitive to different textures, encouraging sensory play can help them feel comfortable trying new textures. Playdough, water and sand play and messy play are good activities to try. Start with dry food textures such as rice and gradually move to wetter textures such as dough.
3
Let children be involved in choosing what they want to eat but limit their choices so they don’t feel overwhelmed. Instead of asking what do you want for a snack? Ask would you like an apple or banana for snack today?
4
From a young age children can be involved in mealtimes from being given finger foods so they can feed themselves to helping to spread toppings, pour their own drink and slice soft fruit.
5
It is common for children to refuse a new food, keep offering that same food at another mealtime. It can take 15-20 times for a child to accept a new food.
6
Children are more likely to try a new food if it is offered with foods they already enjoy. They learn by copying others so try to eat meals together and let them see you eat a variety of foods.
7
Try to remain calm at mealtimes and not show you are upset or worried by your child not eating.
1
Young children don’t eat well if they are very hungry or tired, avoid this by setting a daily routine of 3 meals and 2-3 snacks per day.
2
Set up an area for eating ideally with a table you can all sit at.
3
Turn off any distractions e.g. TV or iPad and put away toys.
4
Eat together as much as possible. Talk about foods you enjoy and avoid making negative comments about foods. Mealtimes can be a great time to help your child’s language skills.
5
Learning to eat is a new skill that takes time often resulting in spills and mess, handle accidents in a calm way. Avoid wiping your child’s hands and face during the meal, wait to the end of the meal to clean them up.
6
Large portions can be overwhelming. Start with small portions, if finished praise your child and offer more.
7
Keep mealtimes to 20-30 minutes, children are unlikely to eat more after this time.
8
Avoid making a completely different meal if your child refuses a meal. Instead try offering 2 courses, a main meal and a nutritious pudding such as fruit and yoghurt, to give your child another opportunity to eat.
9
Avoid giving snacks or drinks too close to mealtimes – this can fill up your child before meals.
10
Try to keep mealtimes calm and take away any uneaten food without comment. Try to ignore fussing at mealtimes, giving lots of attention when your child is not eating may encourage them to continue behaving this way.
11
Keep offering a food even if your child has previously rejected that same food – it can take 15-20 times for a child to try a new food.
12
Give your child praise and attention when eating well or trying new foods.
13
Try foods in different forms, for example, a child may not eat cooked carrot but may eat raw carrot.
14
Children are more likely to try new foods if they are offered with foods they already like. Try putting new foods in a separate bowl or plate.
15
Never force a child to eat. Using pressure, force or coercion to get your child to eat often has the opposite effect.
16
Let your child decide how much to eat, young children are really good at regulating their own appetite. Their appetites can vary day to day so they may eat more on some days than others. If your child is showing signs they have had enough, take the food away without any comment.
Non-food rewards
There are lots of ways to reward or comfort your child without using food.
Ideas include:
- Praise, claps and a simple well done.
- Use hugs and kisses to comfort your child.
- Stickers.
- A favourite game or activity.
- Trip to the park.
Happy mealtimes animation
The NYLO team show us how they get ready and enjoy mealtimes together.
Faddy eating in young children
Understanding food labels
Reading and understanding food labels can really help to ensure we are giving children healthy food.
The quickest place to look if you want a snapshot of the nutrition information is the front of the pack. Most products display a traffic light label. This uses colours to show the amounts of that nutrient present in the item. It can be useful to compare similar products and to help you make healthier food choices.
The Food Standards Agency have created this quick guide to reading front of pack labels.
More nutrition information can be found on the back of the pack such as ingredients, allergens, nutrition per 100g, nutrition per serving/portion and number of servings per pack.
Cooking with children
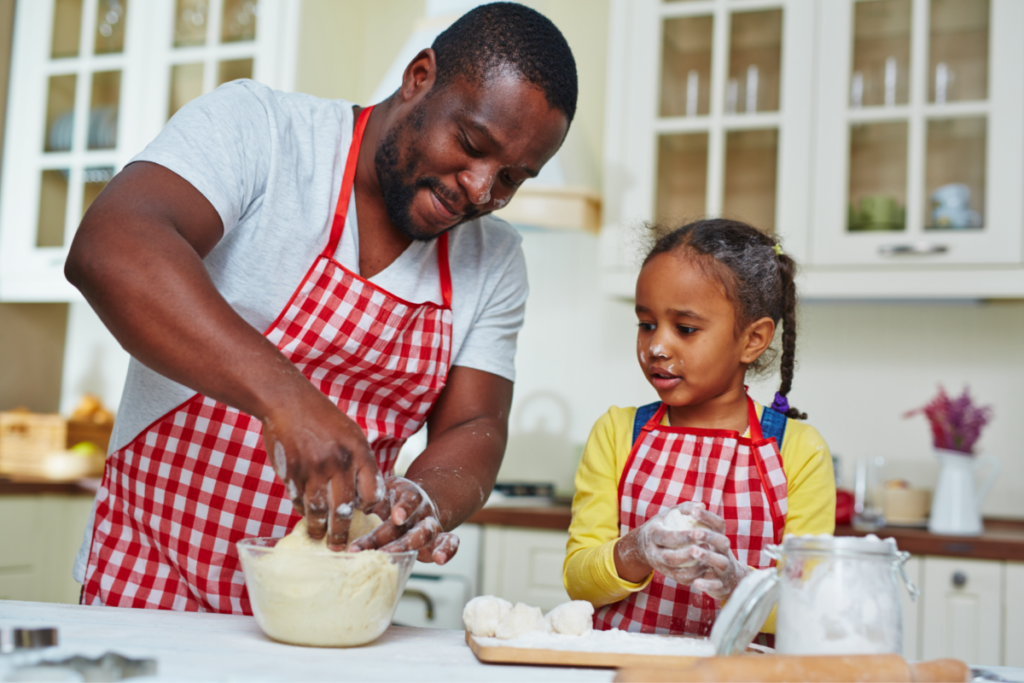
The benefits of cooking with children
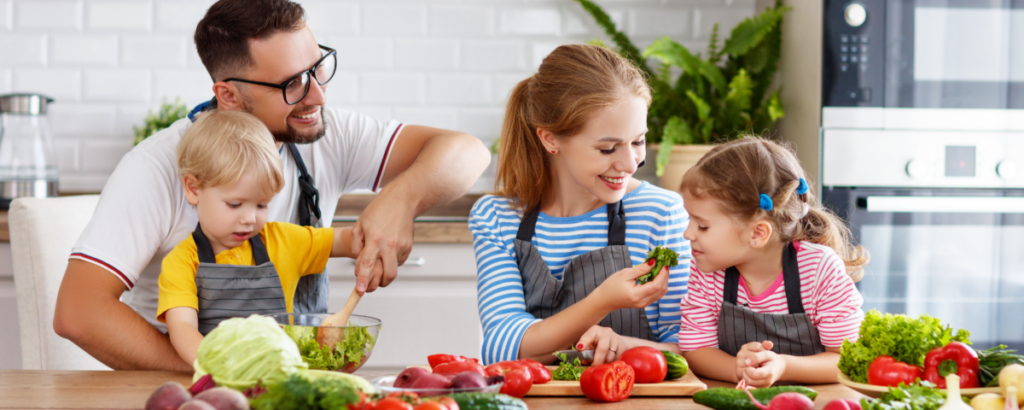
Cooking with your child from a young age can offer a wide range of valuable learning opportunities. Giving children the chance to explore food in a safe and fun way outside of meal times may help reduce anxiety around food. Children are much more likely to try new foods if they have seen where it comes from and helped with the preparation. Having repeated positive experiences during food activities can increase a child’s confidence around food, and help to ensure healthy eating habits in later life.
Cooking can help to develop many skills
- Coordination – chopping stirring, squeezing, mashing, mixing, tearing
- Fine motor skills – sprinkling, spooning, spreading, cutting, kneading
- Independence – carrying out tasks on their own, weighing out and washing fruit and vegetables
- Cognitive development – thinking, problem-solving, and creativity
- Cause and effect
- Language and Numeracy
Remember cooking together with your little one can also be a lot of fun!
Recipes for cooking with children
Ingredients
- 2 bread / English muffins, each cut in half width way
- 4 teaspoons of tomato puree
- 4 tablespoons of grated cheese
- Selection of toppings: Chopped or shredded cooked chicken, sliced peppers, diced onions, sweetcorn, sliced mushrooms, pineapple chunks, flaked tinned tuna (in spring water)
Equipment
Chopping board, knife, teaspoon, grater, tablespoon, tin opener, baking tray
Before you start
- Slice the muffins in half
- Prepare the toppings
- Grate the cheese
How to make it
- Pre-heat the oven to 200oC / fan oven 180oC / Gas Mark 4
- Spread a teaspoon of tomato puree over each muffin half
- Sprinkle a tablespoon of grated cheese over each muffin half
- Add the toppings of your choice. To make it fun, arrange the toppings to make a face or pattern
- Put the mini pizzas on a baking tray and place on the middle shelf of the oven.
- Cook for 10 – 15 minutes, until the cheese has melted and the muffins are lightly toasted
What the children can do
- Spread the tomato puree on the muffin half
- Sprinkle the grated cheese
- Help to chop toppings
- Add the toppings they want. They can also make a face or pattern with their chosen toppings
Skills
- Spreading, chopping
Ingredients
- 2 large tortilla wraps
- 60g cheddar cheese, grated
- Salad vegetables
- Fillings, such as: chopped or shredded cooked chicken, flaked tinned fish (in spring water), drained tin of mixed beans, hummus
Equipment
Chopping board, knife, weighing scales, grater, tin opener, teaspoon, frying pan, spatula / fish slice
Before you start
- Grate the cheese
- Chop, grate or shred the salad vegetables and fillings of your choice
How to make it
- Heat a frying pan, over a medium to high heat
- Fill one half of each tortilla wrap in layers, as follows – a sprinkle of cheese, layer of the salad vegetables, filling of your choice and another sprinkle of cheese around the edge of the filled half of the wrap.
- Fold the unfilled half over the top of the filling, to cover it, and cook in a frying pan, over a high heat. Cook on each side for 1 minute or until cheese has melted (sticking the edges of the wrap together) and the filling is warmed.
- Cut each quesadilla in half, thirds or strips and serve as a tasty snack
What the children can do
- Weigh the cheese
- Shred the lettuce or spinach, if using
- Shred the cooked chicken, if using
- Add the filings they want to their wrap
Skills
- Weighing, cutting, adding ingredients, grating
Hints and tips
You can watch a video on how to make the quesadillas on the Keeping Me Well website
Healthy snack recipes
Ingredients
A selection of fruit such as grapes, berries (strawberries, raspberries, blueberries, blackberries), Kiwis, pineapple chunks, satsuma (any small orange), mango, melon
Equipment
Colander, chopping board, knife, peeler, coffee stirrers
Before you start
- Wash the fruit
- Remove the stalks from the strawberries
- Peel and destone the mango
- Slice the melon into rounds
- Peel the kiwi fruit
How to make it
- Prepare the fruit
a) Slice grapes lengthways
b) Kiwis sliced and halved
c) Peel and separate the satsuma
d) Cut the mango into cubes
e) Cut the melon into cubes - Thread the fruit onto the coffee stirrers in rainbow colour order
Show the children
- How to prepare fruit (e.g. using the ‘bridge’ to the cut strawberries and kiwi in half)
- How to peel the kiwi fruit with a peeler if using kiwi
- How to thread the fruit onto the coffee stirrers
What the children can do (with adult help):
- Cut the fruit as needed
- Peel the kiwi fruit
- Thread the fruit
Skills
- Cutting, peeling, threading
Hints and Tips
- Tinned fruit in natural juice such as tinned pineapple and peaches can be used as well
- Why not serve warm place under the grill for a few minutes, turning once and serve with natural yogurt
Ingredients
- 1 x 400g can of chickpeas, drained & rinsed
- 1-2 garlic cloves
- Juice of 1 lemon
- 3 tablespoons of plain yogurt
- 50ml of cold water (if needed)
- Black pepper to season
Equipment
Mixing bowl, tin opener, colander, potato masher or fork, garlic crusher, lemon squeezer, table spoon and teaspoon
Before you start
- Open and drain the tin of chickpeas
How to make it
- Empty the chickpeas into your mixing bowl and mash them up with the potato masher until a rough paste is formed.
- Peel the garlic cloves and crush with the garlic crusher, add this to the chickpea paste.
- Slice the lemon in half and squeeze each half into the chickpea mix.
- Add 3 tablespoons of plain yogurt and a sprinkle of black pepper and give it a good stir.
Show the children
- How to prepare fruit (e.g. using the ‘bridge’ to the cut strawberries and kiwi in half)
- How to peel the kiwi fruit with a peeler if using kiwi
- How to thread the fruit onto the coffee stirrers
What the children can do (with adult help):
- Help mash the chickpeas
- Crush the garlic cloves
- Help slice and squeeze the lemon
- Scoop and add plain yogurt
- Sprinkle black pepper
Skills
- Cutting, peeling, threading
Hints and Tips
- Add some herbs or other flavours i.e. beetroot, grated carrot, pea
- Serve with pita bread and vegetable fingers i.e. carrots, peppers, cucumber
Ingredients
- 1 soft tortilla wrap
- Plain yoghurt – 2 dessertspoons per tortilla
- A selection of fruit eg melon, small orange (clementine, mandarin, satsuma) strawberries, blueberries, bananas, apples, pineapple etc
Equipment
Chopping board, plate, colander, dessertspoon, vegetable knife, grater, small cutters, teaspoon
Before you start
- Wash the non-peel fruit
- Peel and cut the melon into flat round slices
- Quarter the apples and remove the core
- Remove the stalks from the strawberries
How to make it
- Place the tortilla wrap on a plate
- Prepare the fruit:
a. Cut out a range of shapes in the melon slices (ie circles for eyes) using pastry cutters
b. Peel the oranges and pull apart the segments
c. Chop the strawberries into slices/ halves
d. Peel and slice the banana
e. Grate the apple
3. Spread the yogurt onto the tortilla using a back of a teaspoon.
4. Arrange the fruits on the tortilla making a ‘face’ ie
a. Hair – grated apple
b. Eyes – melon circles or banana slices with a blueberry in the middle
c. Ears and nose – strawberry slices or orange segments
d. Mouth – a smile of blueberries or orange segments
5. To eat, either cut into quarters, or roll in up into a wrap and cut it in half.
6. Serve straight away.
Show the children
- How to prepare fruit (e.g. using the ‘bridge’ to the cut strawberries and kiwi in half)
- How to peel the kiwi fruit with a peeler if using kiwi
- How to thread the fruit onto the coffee stirrers
What the children can do (with adult help):
- Wash the non peel fruit, using the colander
- Cut out the melon shapes using the cutter
- Peel the small orange and pull apart the segments
- Cut the strawberries in half using the ‘bridge’
- Peel and slice the banana using the ‘bridge’
- Grate the apple
- Spread the yoghurt with a back of a teaspoon
- Arrange the fruit in a ‘face’
Skills
- Cutting, peeling, threading
Hints and Tips
- Add some herbs or other flavours i.e. beetroot, grated carrot, pea
- Serve with pita bread and vegetable fingers i.e. carrots, peppers, cucumber
Ingredients
- Cream Crackers
- Hummus, cream cheese, guacamole or tomato puree
- Chosen toppings for example chopped peppers, tinned sweetcorn, grated carrot, sliced strawberries, halved grapes, blueberries etc
Equipment
Chopping board, vegetable knife, teaspoon
Before you start
- Wash the chosen fruit and vegetables
- Prepare the ingredients for the toppings and place in the bowls (the children can help to prepare these)
How to make it
- Take a teaspoon of the base (hummus, cream cheese) and using the back of the teaspoon spread it over the cracker.
- Place the prepared toppings on the crackers in the design of your choice!
What the children can do (with adult help):
- Help chop the toppings
- Spread on the base with the back of a teaspoon
- Place the toppings on the cracker
Skills
- Chopping, spreading, decorating
Hints and Tips
- Maybe get your child to draw out a design beforehand.
- Try making animal face, different patterns or even vehicles!
- Why not try using a different variety and different shaped crackers
Fruity faces animation
Nancy Nectarine talks about her favourite food activity and snack.
Benefits of Being Active
Being physically active is beneficial to children in many ways and can form habits which last their lifetime.
Activity ideas
What you’ll need to get started:
- Spaghetti pasta
- A variety of different pasta tubes and shapes that have a hole in like penne, macaroni, rigatoni, cannelloni, wheel-shaped (rotelle), or character shapes
- Different colours of food colouring (optional if colouring pasta)
- Vinegar (optional if colouring the pasta)
- Playdough
- Pipe cleaners, straws or spaghetti (wool, string, laces for older children)
- Resealable freezer bags or container with a sealable lid
How to make it:
- To colour your pasta put a dollop of food colouring and a teaspoon of vinegar into a resealable bag/ container and mix together.
- Add the pasta to it and try and cover with the colour. Get your child to slowly move the pasta in the plastic bag or shake the tub so that the colour covers the pasta.
- If the colour isn’t evenly distributed or you want a brighter colour you can add another teaspoon of vinegar or more food colouring.
- Pour the coloured pasta on to a tray or baking tray and leave to dry. Ideally overnight, but it should be dry within a few hours.
- Make on colour or several, just repeat steps 1 – 4 with a different colour food dye!
Activities for 12 months – 2 years:
- Shape the playdough into balls on a tray or table top, and squash them slightly.
- Place the spaghetti pasta in the dough, or you could use a straw, and make sure it is secure. Then give your child the pasta shapes and get them threading!
- It may be best to start off using larger tubes of pasta with younger children then as they get used to doing it then maybe move onto the smaller pieces of pasta.
- Keep the pasta in an air tight tub and use again and again!
Activities for 2 – 5 years:
- As your child grows you could progress and use a length of wool (or ribbon, string or a shoelace) to make pasta necklaces or bracelets! Its best to wrap some sticky tape around the end of the wool as this will make the threading much easier, as the wool will easily pass through the holes in the pasta shapes.
What you’ll need:
- Fruits such as apples, orange, lemons, pears.
- Vegetables such as potatoes, cauliflower, peppers, carrots, corn on the cob, mushrooms, cabbage
- Paper
- Ready to use paint in different colours
- Plate/ containers/ trays (for paint)
- Chopping board
- Knife
- Newspaper/ kitchen roll
How to make it:
- Wash the fruit and vegetables you will be using and dry them with a tea towel.
- Using the chopping board, cut your fruit and vegetables in half with a knife. This is something you can get your child to help you with – check out our film on healthy snack ideas which shows different safe cutting techniques.
- Dab the cut side with some kitchen roll or newspaper to soak up the moisture, as this will help the paint stick better.
- Pour the paint you are using into a shallow container, such as a plate or dish. If you are using more than one colour, then add to multiple plates with the different colours.
- You can either apply the paint using a sponge or paintbrush, or dip the fruit straight into the paint. Make sure that the piece is covered evenly with a thin coat of paint.
- Press the fruit/ vegetable firmly to the paper, ink side down and remove – that’s your first print done!
- Now you could explore printing with different fruit and vegetables, cut in different ways to make great pictures!
Hints and Tips
- Aim for firm fruits as these make a more visible print
- Don’t apply too much paint as it could make the prints outline blurry
- Make patterns and pictures using different vegetables together. For example, cut cauliflower into individual florets and use them to make a picture of a big tree!
- Please don’t eat the fruit and vegetables after you have used them with the paint as this could make you unwell.
- Don’t forget to let your painting dry for a few hours once you have finished.
Your toddlers will love playing with uncooked rice, it is a versatile ingredient you can use in lots of different ways – time and time again. You can use the rice as it is, or you can colour it different colours of the rainbow, or even add different scents – which will help develop your child’s imagination and sensory experience even further!
What you’ll need:
- Large bag of rice
- Resealable plastic bags
- Food colouring in a variety of different colours
- Vinegar (optional)
- Tray
- Large tub/container
How to dye your rice
- Divide the rice between the sealable bags
- Add a few drops of each colour you are using into each bag of rice.
- Seal the bag and shake to distribute the colour. This is something your child will enjoy doing!
- You can add a spoonful of vinegar, as this can help the colour last longer.
- Spread the rice out on a tray to dry – it should be dry within a few hours.
- Once the rice is dry, pour into a large tub/ container or a shallow dish and try these different activities! If you are using a smaller tub then it may be best to use a sheet or play mat underneath to help contain the rice!
Activities for 12 months – 2 years
- If you are using different colours you could arrange it in a pattern or mix the colours together.
- Scoop and pour the rice using different utensils such as smaller bowls, funnels, spoons, tubes, or ice cube trays to scoop. Your child will love seeing the rice ‘move’ and flow.
- Encourage your child to stick their hands into the rice to feel the different shapes and textures of the rice.
- Hide puzzle or alphabet pieces in the rice for your child to find, this will make putting the puzzle together more fun.
- Have a rice-tea party! – add the rice to a toy teapot and pour into cups as part of a tea party with other toys.
- Add toy animals, dinosaurs or any other creatures to the rice – either hide for your child to search through the rice and find or just to play on.
- Use your children’s mini diggers or trucks to dig the rice up and pretend it’s a building site.
- The rice can also be kept in the bags for your child to play – they will love being able to feel the rice through the bag.
- You could also add a scent to the rice. A lemon or orange squeezed in with the rice as well as the food colouring, or a natural essence or even herbs could be used.
Activities for 2 years – 5 years
- Craft with your rainbow rice – grab some plain and coloured card or paper and some glue – use these to make colourful rainbows with each colour rice, or make rice monsters or creatures.
Hints and Tips
- Why not use dry pasta to play with instead? This can be a good way to start introducing your child to different textures.
- Use different shaped pasta such as penne (tubes), fusilli (spirals), conchiglie (shells), farfalle (bows) add it to a medium/ large sized container.
- To make things a bit more challenging, you could hide small objects in the pasta for your little one to find, like small toys or puzzles.
- Once your child has finished playing with the pasta it can be stored in a container to use again.
- When your child is comfortable with dry textures, like pasta and rice, they can start moving on to wetter textures – such as cooked spaghetti, wet oats.
- Some pastas come in different colours which you could also try, or see our pasta threading film on how to colour pasta different colours!
Playing with oats can be carried out with children from 6 months onwards as both a sensory and developmental activity.
Extras
- Porridge Oats
- Tray or shallow container
Equipment
- Funnel
- Jug
- Bowls
- Beakers
- Spoons
- Diggers and cars
- Tea set
- Mega blocks
- Water (optional for wet play)
How to play with oats
- Pour the bag of porridge oats into a tray and let your little one get stuck in. Give them time to explore the texture of the dry oats with their hands.
- For further fun exploration, offer them a range of objects that encourages scooping, pouring, digging etc. You could even put your little one’s favourite toys in there. Such as a digger or car set, a tea set, mega blocks etc.
- You could also introduce your little one to ‘wet play’ by adding a little water to the oats. Scoop some oats from your tray into a separate bowl and gradually add some water with a spoon or jug.
- Let them play and explore each level of texture, from dry to tacky and wet. If you have any moulds or cookie cutters, your little one could have fun making different shapes when the oats are wet and gooey.
Growing from seed is a great way to teach your child about where food comes from. The process of planting a seed in soil, taking care of it whilst it grows into something you can eat is magical for young children to be a part of. It is important that you start with seeds that grow quite fast – so it keeps their interest and gives them a positive experience of gardening. A child is also more likely to try new food they have grown themselves. You don’t need access to a garden to grow – all you need is compost / soil, something to grow it in and a watering can!
Equipment
- Cress seeds (you can get these from a garden centre)
- An empty egg shell, yogurt pot or paper cup
- Felt-tip pens or paint and paint brushes
- Kitchen roll
- Cotton wool
- Water
- Teaspoon
How to make
- Decorate the empty egg shell, yogurt pot or paper cup using the felt-tip pens or paint and paint brushes. You and your child could draw funny faces so when the cress grows it’ll look like green hair
- Wet some kitchen roll and place it at the bottom of the egg shell, yogurt pot or paper cup
- Then wet some cotton wool and place this on top of the kitchen roll. Leave a small gap (about 2 – 3cm) between the cotton wool and the top of the eggshell, yogurt or paper cup
- Sprinkle a teaspoon of the cress seeds evenly onto the wet cotton wool. Press them down gently with your finger tips
- Put in a warm place that gets plenty of sunlight, like a windowsill, to grow
- Add a little water every day to make sure the cotton wool remains moist. The cress should grow in 7 – 10 days
- When the cress has grown about 10 cm, cut it with a pair of scissors and add to a sandwich or the quesadilla recipe.
Hints and tips
- Teach not to over water
- Use unusual containers like old boots (which you can paint) tea pots, old pans, old tyre , teacups
What you’ll need:
- Cooked and cooled spaghetti
- Food colouring – as many different colours as you like
- Large tray
- An assortment of little toys/food models
- Small bucket or container
- 3-4 bowls and a permanent marker pen
Before you start:
- Cook and cool spaghetti
- Collect an assortment of small toys
- If using pebbles, number them 1-10
How to make it:
- Place approximately 8 drops of each colour food dye into separate bowls and add even portions of cooked and cooled spaghetti into the bowls.
- Tip your spaghetti onto a surface to dry.
- Once dry tip into the bucket or container and add the pebbles or toys.
Skills
- Pouring, mixing, counting, fine motor skills
Hints and tips
- Try taste testing some of the cooked and coloured pieces of spaghetti – this will help to introduce kids to new textures.
- Get the kids involved by asking them to mix the food colouring with the cooled spaghetti and collect small toys for them to find in their spaghetti worms.
- If the spaghetti becomes too dry and sticky, have some water handy to squirt onto the pasta to help keep it smooth and slippery to handle.
- Make sure the pebbles or toys are too big to swallow.
- You can practice your counting and naming skills by counting all the toys/pebbles you’ve found in total and using descriptive words for each toy.
What you’ll need:
- 1 cup Flour
- 1 cup Water
- 1/2 cup of Salt
- 2 tsp. Cream of Tartar
- 1 Tbs. Vegetable Oil
- 2 tsp food colouring
- A cup
- A tablespoon
- A saucepan
- Mixing bowl
- Whisk
- Rice
- Edible essences e.g. mint, orange

How to make it:
- Get your child to help you measure out your dry ingredients and pour them into your saucepan
- Add 1 tablespoon of oil to the dry ingredients
- In separate dishes, combine the food colouring to water, one for each colour you wish to use. Add your coloured water to your saucepan of dry ingredients.
- Allow your child to help with whisking your ingredients before heating to remove any lumps, or blend all the ingredients.
- Cook over medium heat constantly stirring until it becomes a thick blob.
- Turn the play dough out onto a clean surface and knead into a smooth blob.
What the children can do (with adult help)
- Measure out dry ingredients
- Measure, pour and mix food colouring and water
- Combine and mix dry and wet ingredients
- Stir mixture
- Knead dough once cooled
Skills
- Measuring, pouring, whisking, kneading
Hints and Tips
- You can always use cold water instead of cooking on the stove. Just stir until it forms a smooth ball of play dough.
- This dough will last for a few weeks in an air tight container or zip-lock bag.
- Use some pipe cleaners/Straws and some googley eyes, you could turn your dough balls into dough monsters.
- You could also make some new dough balls with natural scents, colouring and added textures, for example: add a couple of teaspoons of freshly grated zest or mash up berries (fresh or defrosted from frozen) to the dough in the final stages. You could even add some herbs and spices or edible essences such as vanilla or mint.
Food Activity Videos
Active Play Ideas
Skills developed: Co-ordination, motor skills
What you’ll need: Soft ball (or roll 3 – 4 socks into a ball)
Indoors
0-12 months
Kick the Ball:
Your baby lies on their back while you kneel facing them with the ball between your knees. Encourage your baby to kick the ball.
Roll the ball:
With both you and your baby lying on your tummies facing each other, roll the ball to them and encourage your baby to push it back to you. As they get better, move further away to make it more challenging.
Reach for the ball:
When your baby can hold their head up while lying on their tummy, place the ball just beyond their reach and encourage them to reach out and grab it.
12 months – 2 years
Kick the ball:
When your child can walk, encourage them to walk towards and kick the ball
Catch the ball:
Hold your child’s arms out and show them how to catch a ball. Sit or stand close to them at first, to make it easier for them.
2 – 5 years
Basket-ball:
Get your child to throw the ball into a wastepaper basket, clothes basket, etc. Increase the distance as they learn to throw more accurately
Outdoors
2 – 5 Years
Dribble the ball:
Create an easy obstacle course and encourage your child to dribble the ball around it (like a football)
Up in the air:
See how long your child can keep batting the ball in the air with their hands, without it falling to the ground. When they become confident with this join in and bat the ball back and forth to each other (with your hands) and see how long you can keep the ‘rally’ going
Skills developed: Agility, co-ordination, motor skills, balance, thinking, problem solving
What you’ll need: Moveable household items to crawl, climb and or jump over and under (e.g. pillows, empty cardboards boxes, chairs, paper/card).
Indoors
0-12 months
Place various objects around your living room. Vary the height and distance between the objects and encourage your child to crawl and climb over, under or through them. You could play this in a garden too.
12 months – 2 years
Make the course slightly more challenging by adding a few more obstacles, using the similar objects as for 0 – 12 months.
Outdoors
2 – 5 years
Make the course together with your child, in the garden, letting them choose some of the obstacles. As they become more agile, add low jumps and objects to balance on. Help your child find their own level of agility. To make it more fun, encourage your child to travel around the obstacle course like their favourite bug / animal (butterfly, spider, ant, bee, frog, etc).
Skills developed: Hand-eye coordination, motor skills, thinking, problem solving
What you’ll need: For the treasure basket you’ll need safe household items from around your home (e.g. spoons, soft sponge, old TV remotes) and a basket / small box.
For the treasure hunt you’ll need favourite toys, familiar household items, etc
Indoors
0-12 months
Treasure Basket
Place the objects for the treasure basket in a basket or small box. Encourage your baby to explore the treasure basket, show them how to take items out and place back into the treasure basket and let them do the same. Allow them to play with the items from the treasure basket too.
12 months – 2 years
Hide and Seek Treasure Hunt
Show your child objects that you’re going to hide. Ask them to look away while you hide them, but not too well. Encourage your child to find the items – helping them along the way by telling them if they’re close (“warm / warmer”) or further away (“colder”). You could also play this outdoors.
Outdoors
2 – 5 years
Hide and Seek Treasure Hunt
The same as for 12 months – 2 years but make finding the items slightly more difficult. This may be easier to play outdoors in a garden. You can also encourage your child to collect and hide items from you or their friends.
Alternatively, place different coloured objects into a treasure basket filled with other pieces of tissue. The children will then be asked to retrieve an object of the chosen colour from the box and bring it back to you. This will continue until all objects have been collected.
Skills developed: listening, agility, co-ordination, motor skills.
What you’ll need: 2 cushions
Indoors
0 – 12 months
Ask your child to sit with you. When you shout ‘green’, encourage them to start clapping their hands in a circle shape. On ‘orange’, they should clap their hands in one place. When you shout ‘red’, they should hold their hands together and not clap at all.
12 months – 2 years
Let the children run in a circle in a clockwise direction. When you say ‘red’ they should stop moving, when you say ‘orange’ they should run/walk on the spot, and on ‘red’ they should stand still.
2 – 5 years
Place 2 cushions quite far apart in your living room. Encourage your child to travel around them in a figure 8. When you say ‘red’, your child should stop, when you say ‘orange’ he should run on the spot and when you say ‘green’ he should run around the cushions in a figure 8. Try to vary the commands. When he gets used to the commands add more things like: speed bump, reverse, traffic jam, etc. This could also be played outdoors using chairs, coats or bags.
Skills developed: hand-eye coordination, counting, motor skills
What you’ll need: bottle of blow bubbles
Indoors
0-12 months
Lie your child on their back and blow bubbles in the air. Show them how to pop them with your hand or fingers and encourage them to do the same (when any bubbles get close to them). If your child can crawl, blow bubbles just out of reach so they crawl towards them and pop them as they land on the floor.
Outdoors
12 months – 2 years
Blow bubbles around the garden or an empty area in the park for your child to chase and pop
2 – 5 years
Blow bubbles around the garden or an empty area in the park for your child to chase and pop. They can count how many they pop each time you blow some. Your child could blow bubbles for you to pop as well. Take a note of how many bubbles you and your child pops to see who can pop the most.
Skills developed: hand-eye coordination, teamwork, counting, motor skills
What you’ll need: a balloon
Indoors
12 months – 2 years
Bat an inflated balloon towards your child and encourage them to catch it or bat it back / up in the air
2 – 5 years
Bat the inflated balloon towards your child and encourage them to bat it back. Try to keep the balloon from falling to the floor for as long as possible. Other children can play along too. Get your child / children to count every time someone bats the balloon, to keep a score. Make a note of the high score and see if you can beat it next time you play.
Skills developed: listening, motor skills, memory
What you’ll need: sofa, table, blanket, etc
Indoors
2 – 5 years
The ‘Captain’ calls out the orders and your child / children listen and follow.
You can make up your own orders but here are some ideas:
- ‘To the ship’ (everyone runs to the ‘ship’ – e.g. sofa)
- ‘Hit the deck’ (everyone lies down on their tummies)
- ‘Periscope up’ (everyone lies on their backs and sticks up one leg)
- ‘Shark attack’ (everyone runs to an ‘island’ e.g. blanket on the ground)
Skills developed: motor skills, thinking, problem solving
What you’ll need:
– Foundation: table, bunk bed, chairs, sofa, boxes, etc
– Shelter: large towels, bed sheets, large blankets
– Décor: pillows, cushions, blankets, fairy lights, toys
Indoors or Outdoors
12 months – 2 years
Build a den for your child to play in. You can drape bed sheets over a table or on the side of bunk beds. Place a blanket on the back of a sofa and chairs. Secure the edges of the blanket to keep it in place. You could use heavy object, like tins, or clothes pegs. Be creative and try other ways to make a den. Add some cushions, pillows and/or blankets to make the den comfy and cosy.
2 – 5 years
Build a den with your child, using the suggestions above.
Getting Started with Solid Foods
Introducing solids is an important stage of development. Most babies are ready to be introduced to solid foods at around 6 months, alongside baby’s usual breast milk or first infant formula. Before 6 months, babies get all the nutrients that they need from breastmilk or infant formula.
In Cardiff and Vale, you will be invited by your Health Visitor to attend an introducing solids group. If you are in a Flying Start area, you will be offered a visit at home to support you with introducing solids.
Speak to your health visitor if you have any questions about introducing solids.
Our friends over at Flying Start have made these easy to understand videos to support you with introducing solids.
For more support visit Cardiff and Vale UHB website Introducing your Baby to Solid Foods – Keeping Me Well.
Suitable foods and textures
Keeping your Baby Safe
Progressing to Family Meals
Foodwise in Pregnancy
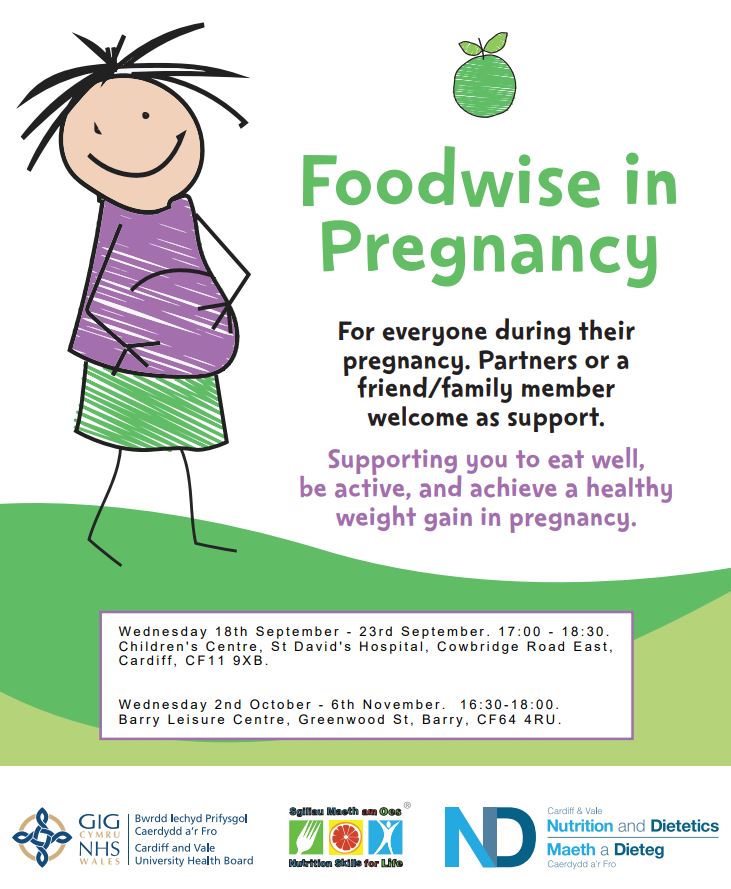
You can book a space on a group using this form: https://forms.office.com/r/7E0J8FNMM7
Unable to attend group? Why not try the free NHS App!


Tips for Saving Time and Money
Family life can be hectic, it can be difficult juggling different commitments and still having time to provide nutritious family meals. The video includes top tips on ways to feed your family well whilst saving time and money.
Local Support
There are lots of local organisations out there that can support you to provide a healthy balanced diet.

Cardiff Money Advice and Support
Cardiff Money Advice Service keep an up to date list of lots of services that can support with food which can be found here: Food – Cardiff Money Advice Service.
Call their money advice line: 02920871071 for further support and advice.
Healthy Start

If you’re more than 10 weeks pregnant or have a child under 4, you may be entitled to get help to buy healthy food and milk. If you’re eligible, you’ll be sent a Healthy Start card with money on it that you can use in some UK shops, every 4 weeks.
Check eligibility online here: How to apply – Get help to buy food and milk (Healthy Start) or ask your Health Visitor for more information.
